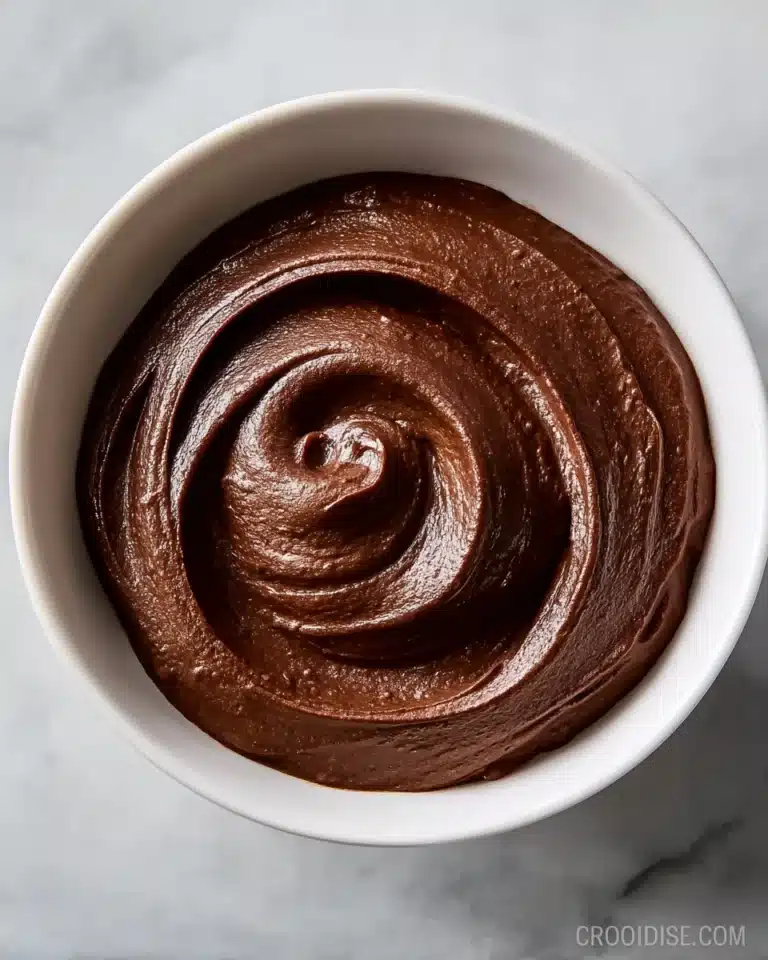
If you’re searching for a luscious dessert that’s both simple and irresistible, let me introduce you to the No Bake Chocolate Pudding Pie. This delightful treat combines creamy chocolate pudding with a fluffy whipped layer, all nestled inside a crisp chocolate cookie crust. It’s perfect for when you want to impress without spending hours in the kitchen or heating up the oven. Every bite offers a smooth chocolatey richness balanced by the airy sweetness of whipped topping, making it a crowd-pleaser whether it’s a casual family dinner or a special occasion.

Ingredients You’ll Need
These ingredients are straightforward and essential, working together to create the perfect texture and flavor of this No Bake Chocolate Pudding Pie. Each one plays a critical role, from the creamy milk to the crunchy chocolate crust, crafting a harmonious dessert experience.
- 2 boxes (3.9 oz each) Jell-O Instant Chocolate Pudding: The star that gives the pie its rich, chocolaty body and smooth texture.
- 2½ cups cold milk (2% or whole): Provides the perfect consistency and creaminess when whisked with the instant pudding mix.
- 8 oz tub Cool Whip: Adds an airy, light contrast to the dense pudding, making the pie feel decadent without heaviness.
- 1 chocolate cookie pie crust (6 oz): Offers a crunchy, chocolatey base that complements the creamy filling perfectly without baking.
- Chocolate bar (optional): Ideal for shaving on top as a decorative and flavorful garnish to elevate the visual appeal and add a touch of refined chocolate.
How to Make No Bake Chocolate Pudding Pie
Step 1: Mix the Chocolate Pudding
Start by pouring the two boxes of instant chocolate pudding mix into a large mixing bowl. Slowly add the cold milk, using a whisk to stir the mixture until it thickens and becomes silky smooth. This step is crucial as it creates the luscious chocolate base that forms the pie’s backbone.
Step 2: Layer the First Pudding Portion
Next, spoon half of the prepared pudding into the chocolate cookie pie crust. Spread it evenly to create a dense, chocolaty bottom layer that will stay firm and flavorful, providing a delightful texture contrast to the airy top layers.
Step 3: Whip Up the Fluffy Pudding Topping
In the remaining pudding, fold in half of the Cool Whip gently until the mixture becomes fluffy and lighter in color. This step transforms the dense pudding into a creamy, mousse-like layer that balances out the richness.
Step 4: Add the Fluffy Pudding Layer
Carefully spoon the fluffy pudding mixture over the initial chocolate pudding layer inside the pie crust. Use a spatula to smooth it out, creating a beautifully layered effect that feels indulgent and inviting.
Step 5: Finish with Whipped Topping and Garnish
Spread the remaining Cool Whip on top of the pie to add a final smooth and creamy touch. If you want to make your pie look extra special, shave some chocolate from your chocolate bar and scatter it over the surface. This not only looks stunning but adds another layer of chocolatey goodness.
Step 6: Chill and Set
Place the pie in the refrigerator and let it chill for at least 2 hours. This resting time allows all the flavors to meld beautifully and the pudding to set firmly, making slicing and serving easy and clean.
How to Serve No Bake Chocolate Pudding Pie

Garnishes
Elevate your No Bake Chocolate Pudding Pie with a few thoughtful garnishes. Fresh berries like raspberries or strawberries add a pop of color and a tangy contrast to the rich chocolate. Alternatively, sprinkle crushed nuts or additional chocolate shavings for texture and an elegant finish.
Side Dishes
This pie shines on its own, but if you want to round out your dessert experience, a scoop of vanilla ice cream or a glass of cold milk pairs wonderfully. The creamy coldness complements the pie’s chocolate layers, making each bite even more enjoyable.
Creative Ways to Present
Try serving the pie in individual dessert glasses layered with the pudding and whipped topping to wow guests with a personalized touch. Or place it on a beautiful cake stand adorned with seasonal flowers or colorful sprinkles to make it the centerpiece of your dessert table.
Make Ahead and Storage
Storing Leftovers
After enjoying your pie, cover any leftovers tightly with plastic wrap or transfer them to an airtight container and store in the refrigerator. The pie will stay fresh and delicious for up to 3 days, making for convenient, tasty treats the next day.
Freezing
If you want to make the No Bake Chocolate Pudding Pie ahead of time, you can freeze it for up to 1 month. Wrap the pie securely in plastic wrap and aluminum foil to prevent freezer burn. When ready to enjoy, thaw it overnight in the refrigerator for the best texture and flavor.
Reheating
This pie is best enjoyed cold straight from the fridge, so reheating is not recommended. Warming it can break down the creamy layers, losing the signature texture of the No Bake Chocolate Pudding Pie.
FAQs
Can I use a different type of pie crust?
Absolutely! While the chocolate cookie crust complements the chocolate pudding perfectly, a graham cracker crust or even a classic pastry crust can work beautifully, depending on your taste preferences.
Is it possible to make this pie dairy-free?
Yes, by substituting dairy milk with almond or coconut milk and using dairy-free whipped topping options, you can make a delicious dairy-free version of this No Bake Chocolate Pudding Pie.
Can I use homemade pudding instead of instant pudding mix?
You can, but instant pudding greatly simplifies the process and guarantees consistent texture. Homemade pudding requires thickening agents and patience but can offer richer flavors if you prefer.
How long does the pie need to chill before serving?
Chilling for at least 2 hours is essential to allow the pudding to set properly. If you’re short on time, an hour may suffice, but the flavors and texture will be best after the full chilling period.
Can I add other flavors to the pie?
Definitely! Adding a splash of espresso to the pudding mix or incorporating a layer of peanut butter whipped cream can add interesting depth to your pie, tailoring it to your own taste adventures.
Final Thoughts
This No Bake Chocolate Pudding Pie is like a warm hug from your sweetest memories—comforting, delightful, and so easy to make. Whether you’re a chocolate lover or just want a quick, crowd-pleasing dessert, this pie delivers on every front. Trust me when I say once you try it, it will become a staple in your dessert rotation. So grab those simple ingredients and get ready to wow yourself and your loved ones with this chocolatey dream!
Print
No Bake Chocolate Pudding Pie Recipe
- Total Time: 2 hours 15 minutes
- Yield: 8 servings
- Diet: Vegetarian
Description
This No Bake Chocolate Pudding Pie is a creamy, rich dessert perfect for any chocolate lover. With layers of smooth chocolate pudding and fluffy whipped topping nestled in a chocolate cookie crust, it’s easy to prepare and requires no oven time. A quick, delicious treat that sets in the fridge and can be garnished with chocolate shavings for an elegant finish.
Ingredients
Pie Layer
- 2 (3.9 oz) boxes Jell-O Instant Chocolate Pudding (4.5 cup serving size)
- 2½ cups cold milk (2% or whole)
- 1 (6 oz) chocolate cookie pie crust
Topping
- 8 oz tub Cool Whip (whipped topping)
- Chocolate bar (optional, for decoration)
Instructions
- Prepare the pudding: In a large mixing bowl, combine the two boxes of instant chocolate pudding mix with 2½ cups of cold milk. Use a whisk to vigorously mix the ingredients until the pudding thickens and is fully combined, usually about 2 minutes.
- Layer the pudding: Spoon half of the prepared chocolate pudding into the bottom of the chocolate cookie pie crust. Spread it out evenly with a spatula to create a smooth base layer.
- Mix pudding and whipped topping: Add half of the Cool Whip tub to the remaining pudding in the bowl. Gently stir the mixture until it becomes light, fluffy, and well combined for a creamy texture.
- Add the whipped pudding layer: Carefully spoon the fluffy pudding-whipped topping mixture over the dark pudding layer in the pie shell. Spread it evenly to create a distinct second layer.
- Top with remaining whipped topping: Spoon the remaining Cool Whip evenly over the second pudding layer. If desired, shave chocolate from a chocolate bar over the top of the pie for a decorative touch.
- Chill and serve: Place the pie in the refrigerator and allow it to chill for at least 2 hours until fully set. Serve chilled and enjoy this creamy, no-bake chocolate delight.
Notes
- For best results, use cold milk to ensure proper pudding consistency.
- Chilling time can be extended if you prefer a firmer set pie.
- Substitute dairy-free whipped topping for a lactose-free version.
- Use reduced-fat cookie crust to lower fat content.
- Optional chocolate shavings add an elegant visual and flavor enhancement.
- Make sure to whisk pudding mixture thoroughly to avoid lumps.
- Prep Time: 15 minutes
- Cook Time: 0 minutes
- Category: Dessert
- Method: No Bake
- Cuisine: American
Nutrition
- Serving Size: 1 slice (1/8 of pie)
- Calories: 280 kcal
- Sugar: 22 g
- Sodium: 150 mg
- Fat: 14 g
- Saturated Fat: 9 g
- Unsaturated Fat: 4 g
- Trans Fat: 0 g
- Carbohydrates: 35 g
- Fiber: 2 g
- Protein: 3 g
- Cholesterol: 10 mg