If you’ve ever wished for a dessert that feels decadent and chewy yet is totally gluten free, I’m beyond excited to share this Easy Chocolate Mochi Brownies (Gluten Free) Recipe with you. These brownies offer the rich, fudgy chocolate flavor you crave, paired with a unique, delightfully chewy mochi texture thanks to glutinous rice flour. Each bite melts in your mouth with a perfect balance of bittersweet chocolate and a hint of coffee, making them an irresistible treat for any occasion.
Ingredients You’ll Need
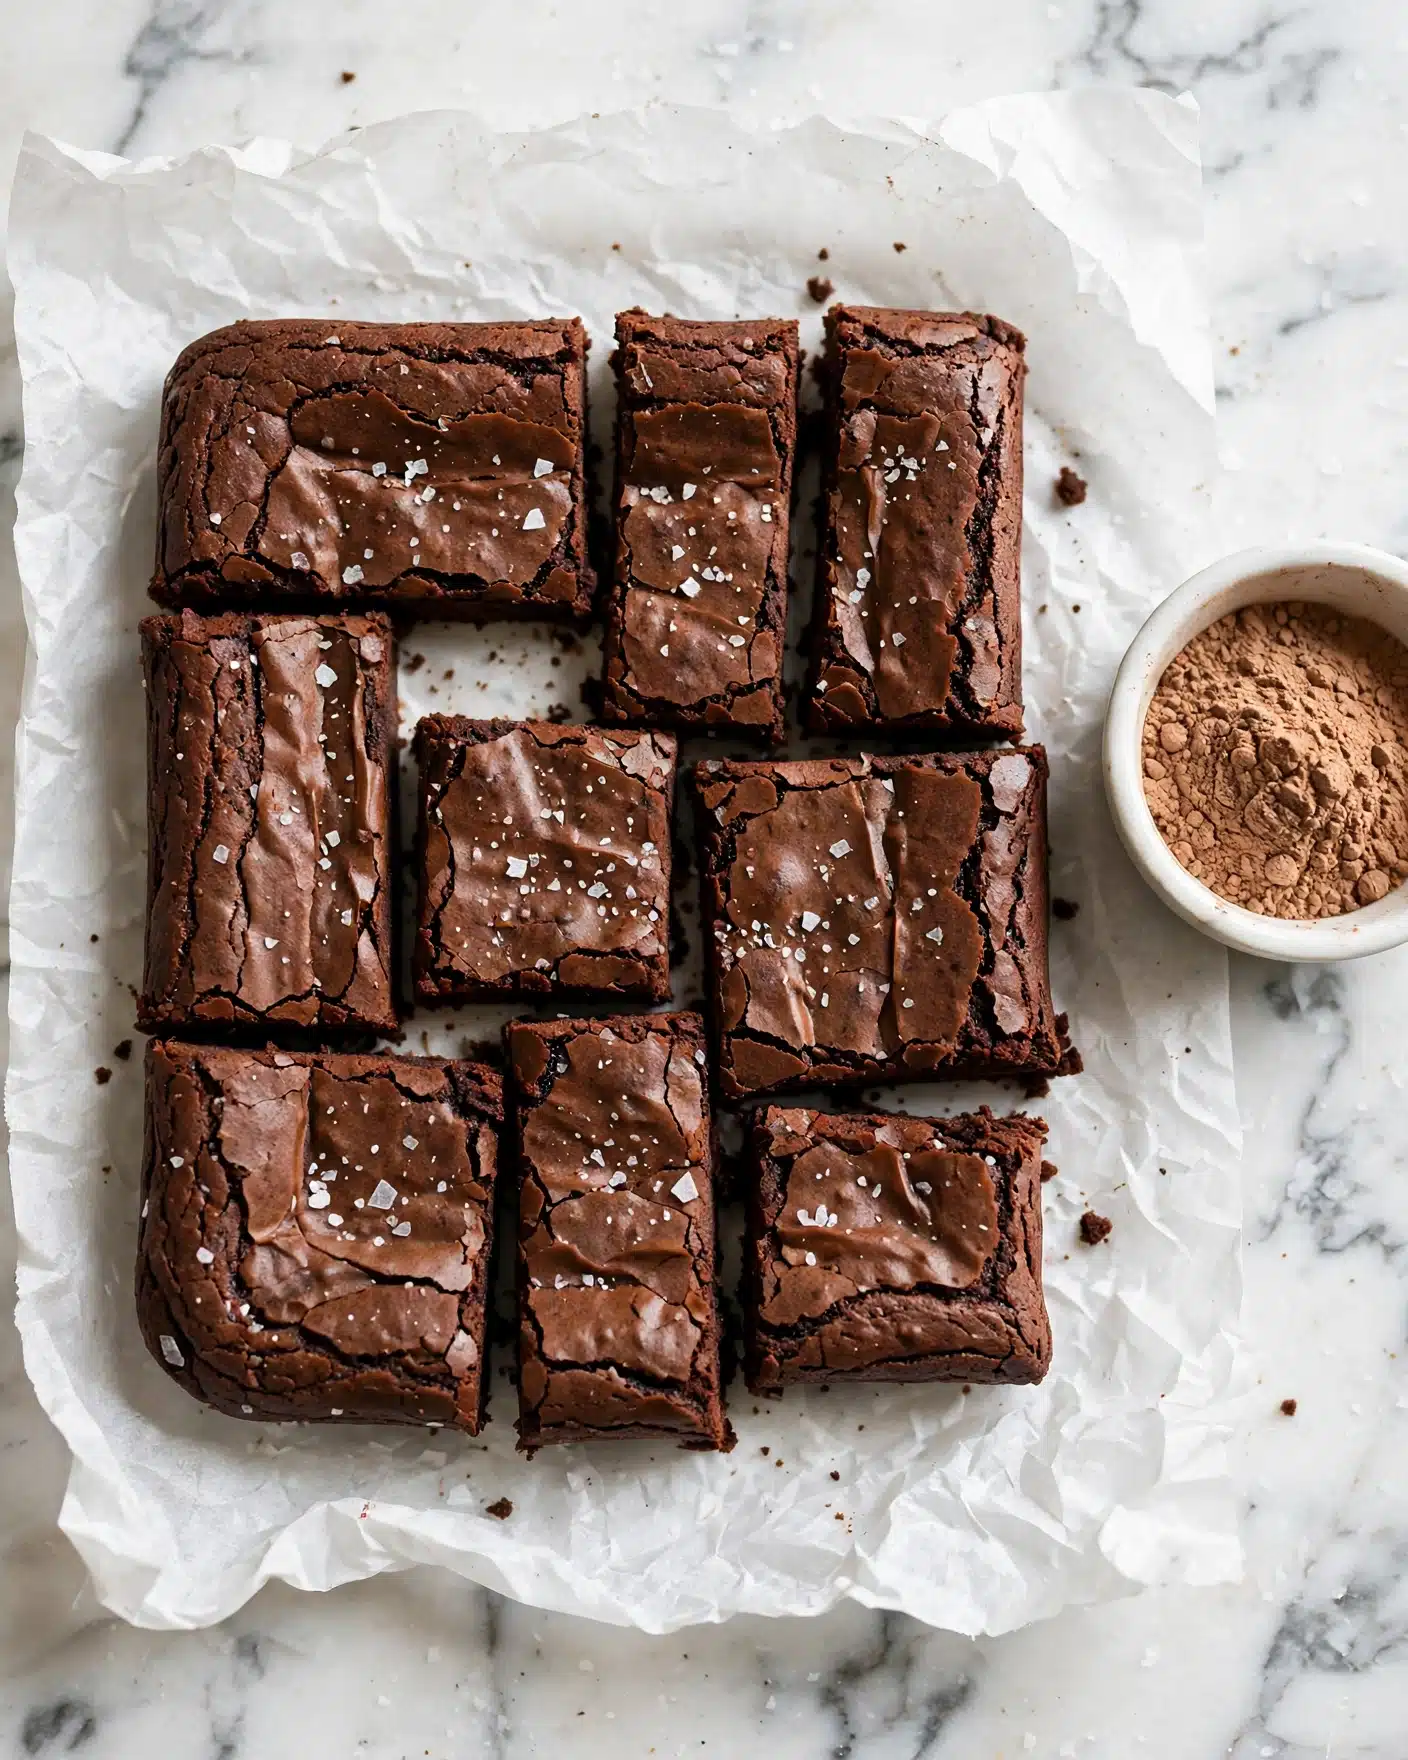
Gathering simple, wholesome ingredients is the first step to nail this recipe. Each component plays a vital role, from the rich cocoa powder that packs the chocolate punch to the coconut milk which brings luscious creaminess without dairy. The magic glutinous rice flour gives these brownies their signature chew and sets them apart from ordinary gluten-free treats.
- 1/2 cup cocoa powder: Provides the deep chocolate flavor and a beautiful dark color.
- 1/4 cup coffee: Enhances and intensifies the chocolate taste without adding a strong coffee flavor.
- 1 Tbsp vanilla extract: Adds warmth and a subtle sweetness that rounds out the flavors.
- 2 eggs: Bind everything together and contribute to the fudgy texture.
- 1 can (14 oz/414 ml) full-fat coconut milk: Gives moisture and richness while keeping the recipe dairy-free.
- 1/4 cup (57 grams) unsalted butter, melted: Adds buttery flavor and helps keep the brownies tender.
- 3/4 cup (150 grams) sugar: Sweetens while balancing the bittersweet chocolate.
- 1 cup (120 grams) glutinous rice flour: The secret ingredient to that unique mochi chewiness.
- 1 1/2 tsp baking powder: Helps give a slight lift to the dense batter.
- 1/2 tsp salt: Enhances flavor and balances the sweetness.
- 1 bar (100 grams) bittersweet chocolate: Chopped chunks sprinkle on top for pockets of ooey-gooey chocolate.
- Flaky sea salt (such as Maldon’s): Adds a finishing touch of crunch and flavor contrast.
How to Make Easy Chocolate Mochi Brownies (Gluten Free) Recipe
Step 1: Bloom the Cocoa Powder
Start by blooming the cocoa powder to bring out its full, rich flavor. Add the coffee to a large bowl, then sift the cocoa powder over it. Whisk until smooth and free of clumps. This step intensifies the chocolatey goodness in every bite and sets the tone for these luscious brownies.
Step 2: Prep the Pan and Preheat the Oven
While your cocoa flavors develop, preheat your oven to 350°F (176°C). Grease your baking pan thoroughly with butter or oil using a pastry brush, making sure to coat the corners and sides well. This ensures your brownies won’t stick and have beautifully clean edges.
Step 3: Add the Wet Ingredients
Next, add your eggs, full-fat coconut milk, melted butter, and vanilla extract to the cocoa mixture. Whisk these ingredients together until you have a smooth, cohesive batter. This creamy mix is crucial for the moist texture and tender crumb that makes these brownies so special.
Step 4: Add the Dry Ingredients
Now it’s time to add sugar, glutinous rice flour, salt, and baking powder to the bowl. Whisk vigorously for 2 to 3 minutes until the batter is silky and completely lump-free. Although the batter will be on the runny side, this is exactly what creates the signature mochi chewiness you’re aiming for.
Step 5: Add the Chocolate Bar
On a cutting board, roughly chop the bittersweet chocolate bar into uneven shards and chunks. This variation creates pockets of melty chocolate gems within every bite. Evenly sprinkle the chopped chocolate chunks over the batter in the baking pan, making sure each square will have a touch of ooey-gooey indulgence.
Step 6: Bake
Place your pan carefully in the preheated oven and bake for about 70 to 75 minutes. You’ll know they are done when the edges puff up and gently pull away from the pan, and the center is set with no jiggle when you shake the pan slightly. This slow bake allows the mochi texture to develop fully.
Step 7: Cool
Once baked, remove the brownies from the oven and let them cool completely for 1 to 2 hours. Cooling is key to letting the brownies firm up and letting flavors meld. Finish by sprinkling flaky sea salt over the top, which adds an irresistible salty crunch that complements the bittersweet chocolate beautifully. Then, cut into squares and get ready to enjoy your gluten-free masterpiece.
How to Serve Easy Chocolate Mochi Brownies (Gluten Free) Recipe

Garnishes
Enhance your brownies by adding a touch of flair with simple garnishes. A light dusting of powdered sugar or a few extra flakes of sea salt heightens the sweet and salty balance. For a fun twist, top with a scoop of dairy-free vanilla ice cream or a drizzle of warm caramel sauce to contrast the chewy mochi texture with creamy cold or gooey decadence.
Side Dishes
Pair these rich brownies with fresh berries or a small bowl of mixed fruit salad to add brightness and natural sweetness. A warm cup of coffee or black tea also complements the layers of chocolate and the subtle coffee note inside the brownies, making each bite feel like a cozy, comforting experience.
Creative Ways to Present
Want to impress your friends? Arrange brownie squares on a platter with edible flowers or fresh mint leaves for a pop of color. For parties, cut these into bite-sized pieces and serve them with toothpicks as a classy finger food dessert. You can even layer them in a clear glass trifle bowl with whipped coconut cream and chocolate shavings for a stunning gluten-free dessert parfait.
Make Ahead and Storage
Storing Leftovers
Store any leftover brownies in an airtight container at room temperature for up to 3 days. The texture stays surprisingly good, with the mochi chewiness and chocolate richness staying intact. For longer storage, refrigerate but allow the brownies to come to room temperature before serving for the best texture.
Freezing
These are fantastic to freeze if you want to prep ahead or keep a stash on hand. Wrap brownies individually or in squares in plastic wrap, then place in a sealed freezer bag. Frozen, they last up to 2 months. Thaw in the fridge overnight and gently warm before serving to revive their delightful chewy texture.
Reheating
To reheat, pop a brownie piece in the microwave for about 15-20 seconds or warm briefly in a preheated oven at 300°F (150°C) for 5-7 minutes. This brings back that fresh-from-the-oven softness and enhances the melty chocolate chunks perfectly.
FAQs
Can I use almond milk instead of coconut milk?
Almond milk is much thinner and will not provide the same richness and moist texture that full-fat coconut milk does. For the best results in this Easy Chocolate Mochi Brownies (Gluten Free) Recipe, stick with full-fat coconut milk.
Can I make these brownies vegan?
To make a vegan version, you’d need to substitute the eggs with flax eggs or a similar binding agent, and replace butter with a plant-based alternative. Keep in mind, the texture might vary slightly but the brownies will still be deliciously chewy and chocolatey.
What makes these brownies mochi-style?
The use of glutinous rice flour gives these brownies their signature chewy and slightly sticky texture, reminiscent of mochi. It’s what truly sets this Easy Chocolate Mochi Brownies (Gluten Free) Recipe apart from traditional brownies.
Why add coffee to the recipe?
The coffee amplifies the depth of the chocolate flavor without overpowering it. It acts as a subtle enhancer, making the cocoa taste more vibrant and complex.
Can I use regular all-purpose flour instead of glutinous rice flour?
All-purpose flour will change the texture entirely and won’t give you the mochi chewiness these brownies are known for. For the true Easy Chocolate Mochi Brownies (Gluten Free) Recipe experience, glutinous rice flour is essential.
Final Thoughts
There’s something truly magical about these Easy Chocolate Mochi Brownies (Gluten Free) Recipe—they manage to feel indulgent and satisfying while still being gluten-free and full of unique texture. Whether you’re making them for a special occasion or a cozy night in, these brownies are sure to become a new household favorite. Give them a try and watch how quickly they disappear!
Print
Easy Chocolate Mochi Brownies (Gluten Free) Recipe
- Total Time: 1 hour 25 minutes
- Yield: 9 servings
- Diet: Gluten Free
Description
These Easy Chocolate Mochi Brownies combine the rich, fudgy texture of classic brownies with the unique chewiness of mochi, thanks to glutinous rice flour. Naturally gluten-free and infused with a hint of coffee and bittersweet chocolate shards, these brownies offer a decadent treat with a delightful texture and flavor twist. Topped with flaky sea salt, they perfect the balance of sweet and savory in every bite.
Ingredients
Wet Ingredients
- 1/4 cup (60 ml) coffee
- 2 eggs
- 1 can (14 oz / 414 ml) full-fat coconut milk
- 1/4 cup (57 grams) unsalted butter, melted
- 1 Tbsp vanilla extract
Dry Ingredients
- 1/2 cup cocoa powder
- 3/4 cup (150 grams) sugar
- 1 cup (120 grams) glutinous rice flour
- 1 1/2 tsp baking powder
- 1/2 tsp salt
Toppings
- 1 bar (100 grams) bittersweet chocolate, roughly chopped
- Flaky sea salt (such as Maldon’s), for sprinkling
Instructions
- Bloom the cocoa powder: In a large bowl, combine the coffee and sift the cocoa powder on top. Whisk together thoroughly until smooth with no clumps. Set aside to allow the flavors to bloom.
- Prep the pan and preheat the oven: Preheat your oven to 350°F (176°C). Grease a baking pan with butter or oil, using a pastry brush to cover the bottom, sides, and corners evenly to prevent sticking.
- Add wet ingredients: To the cocoa mixture, add eggs, full-fat coconut milk, melted butter, and vanilla extract. Whisk everything together until fully combined and smooth.
- Add dry ingredients: Incorporate sugar, glutinous rice flour, salt, and baking powder into the wet mixture. Whisk vigorously for 2-3 minutes until the batter is smooth and no lumps remain. The batter will be runny and loose.
- Transfer batter to pan: Pour the batter into the prepared baking pan, scraping the bowl clean with a spatula to ensure all the batter is transferred.
- Add chocolate shards: Roughly chop the bittersweet chocolate bar into a mix of shards and chunks. Evenly sprinkle these pieces over the top of the batter.
- Bake: Place the pan in the preheated oven and bake for 70-75 minutes or until the edges are puffed, pulling away from the sides of the pan, and the center is set with no jiggle when you gently shake the pan.
- Cool and finish: Remove the brownies from the oven and allow them to cool for 1-2 hours. Once cooled, sprinkle the top with flaky sea salt. Cut into squares and serve.
Notes
- Make sure to fully grease the pan including the sides and corners to prevent sticking.
- The batter will be runny; this is normal for mochi brownies.
- Use full-fat coconut milk for best texture and flavor.
- Allow the brownies to cool completely to set properly before slicing.
- Flaky sea salt on top enhances the chocolate flavor with a salty contrast.
- These brownies are naturally gluten-free due to the use of glutinous rice flour.
- Prep Time: 15 minutes
- Cook Time: 1 hour 10 minutes
- Category: Dessert
- Method: Baking
- Cuisine: Fusion