
If you’ve been searching for a deliciously soft yet crisp snack that fits your dietary needs, you’re going to love this Gluten Free Breadsticks with Garlic Butter Recipe. These breadsticks bring together the perfect balance of airy texture and rich, buttery garlic flavor, making them an irresistible treat for any occasion. Whether you’re serving them alongside a hearty soup, a fresh salad, or just reaching for a satisfying bite, these gluten free breadsticks are sure to become a beloved staple in your kitchen. Plus, baking them yourself means you get all the freshness and homey goodness that store-bought versions simply can’t match.
Ingredients You’ll Need
Creating these Gluten Free Breadsticks with Garlic Butter Recipe is straightforward thanks to the simplicity and quality of each ingredient. Every item in this list plays a crucial role in crafting the perfect texture, flavor, and appearance of your breadsticks.
- 150 grams water: Warm water helps activate the yeast, kickstarting the dough’s rise and softness.
- 120 grams Caputo Fioreglut gluten free flour: A key gluten free flour blend that provides structure and that classic breadstick bite.
- 70 grams super fine brown rice flour: Adds a delicate crumb and slight nuttiness to the dough.
- 10 grams granulated sugar: Feeds the yeast for a lovely rise and a subtle hint of sweetness.
- 5 grams milk powder (optional): Adds richness and helps with browning but can be skipped for dairy-free needs.
- 3 grams kosher salt: Enhances all the flavors, keeping each bite perfectly balanced.
- 3 grams instant yeast: The magic ingredient that makes the dough rise light and fluffy.
- 10 grams olive oil: Adds moisture and a hint of fruity flavor while helping create a tender crust.
- Fine or medium coarse cornmeal (optional): Sprinkled on the baking sheet for texture and to help prevent sticking.
- 50 grams unsalted butter: Foundation of the luscious garlic butter that will coat your breadsticks.
- 1 teaspoon garlic powder (or fresh minced garlic): Delivers that irresistible savory punch.
- 1 teaspoon dried parsley: Adds a splash of color and a touch of herbal freshness.
- Generous pinch of kosher salt: Balances the butter mixture to make it savory perfection.
How to Make Gluten Free Breadsticks with Garlic Butter Recipe
Step 1: Preparing the Dough
Start by warming the water until it reaches about 120 to 129°F, the perfect temperature to activate your instant yeast without killing it. While the water warms, whisk together all the dry ingredients — the Caputo Fioreglut gluten free flour, super fine brown rice flour, sugar, milk powder, yeast, and salt. When your water’s ready, pour it in with the olive oil. Stir energetically with a dough whisk or wooden spoon until the textures meld into a smooth but slightly lumpy dough. It might look wet at first, but trust the flours; they’ll soak it up—think of it as a gentle arm workout to show your love for baking!
Step 2: First Rest for the Dough
Use a flexible spatula to scrape the dough into a ball inside your bowl. This helps for easier handling down the line. Cover the bowl with a clean towel and let the dough rest for about 10 to 15 minutes—this little break gives the flours time to hydrate fully, which means tastier, more consistent breadsticks.
Step 3: Shaping and Proofing
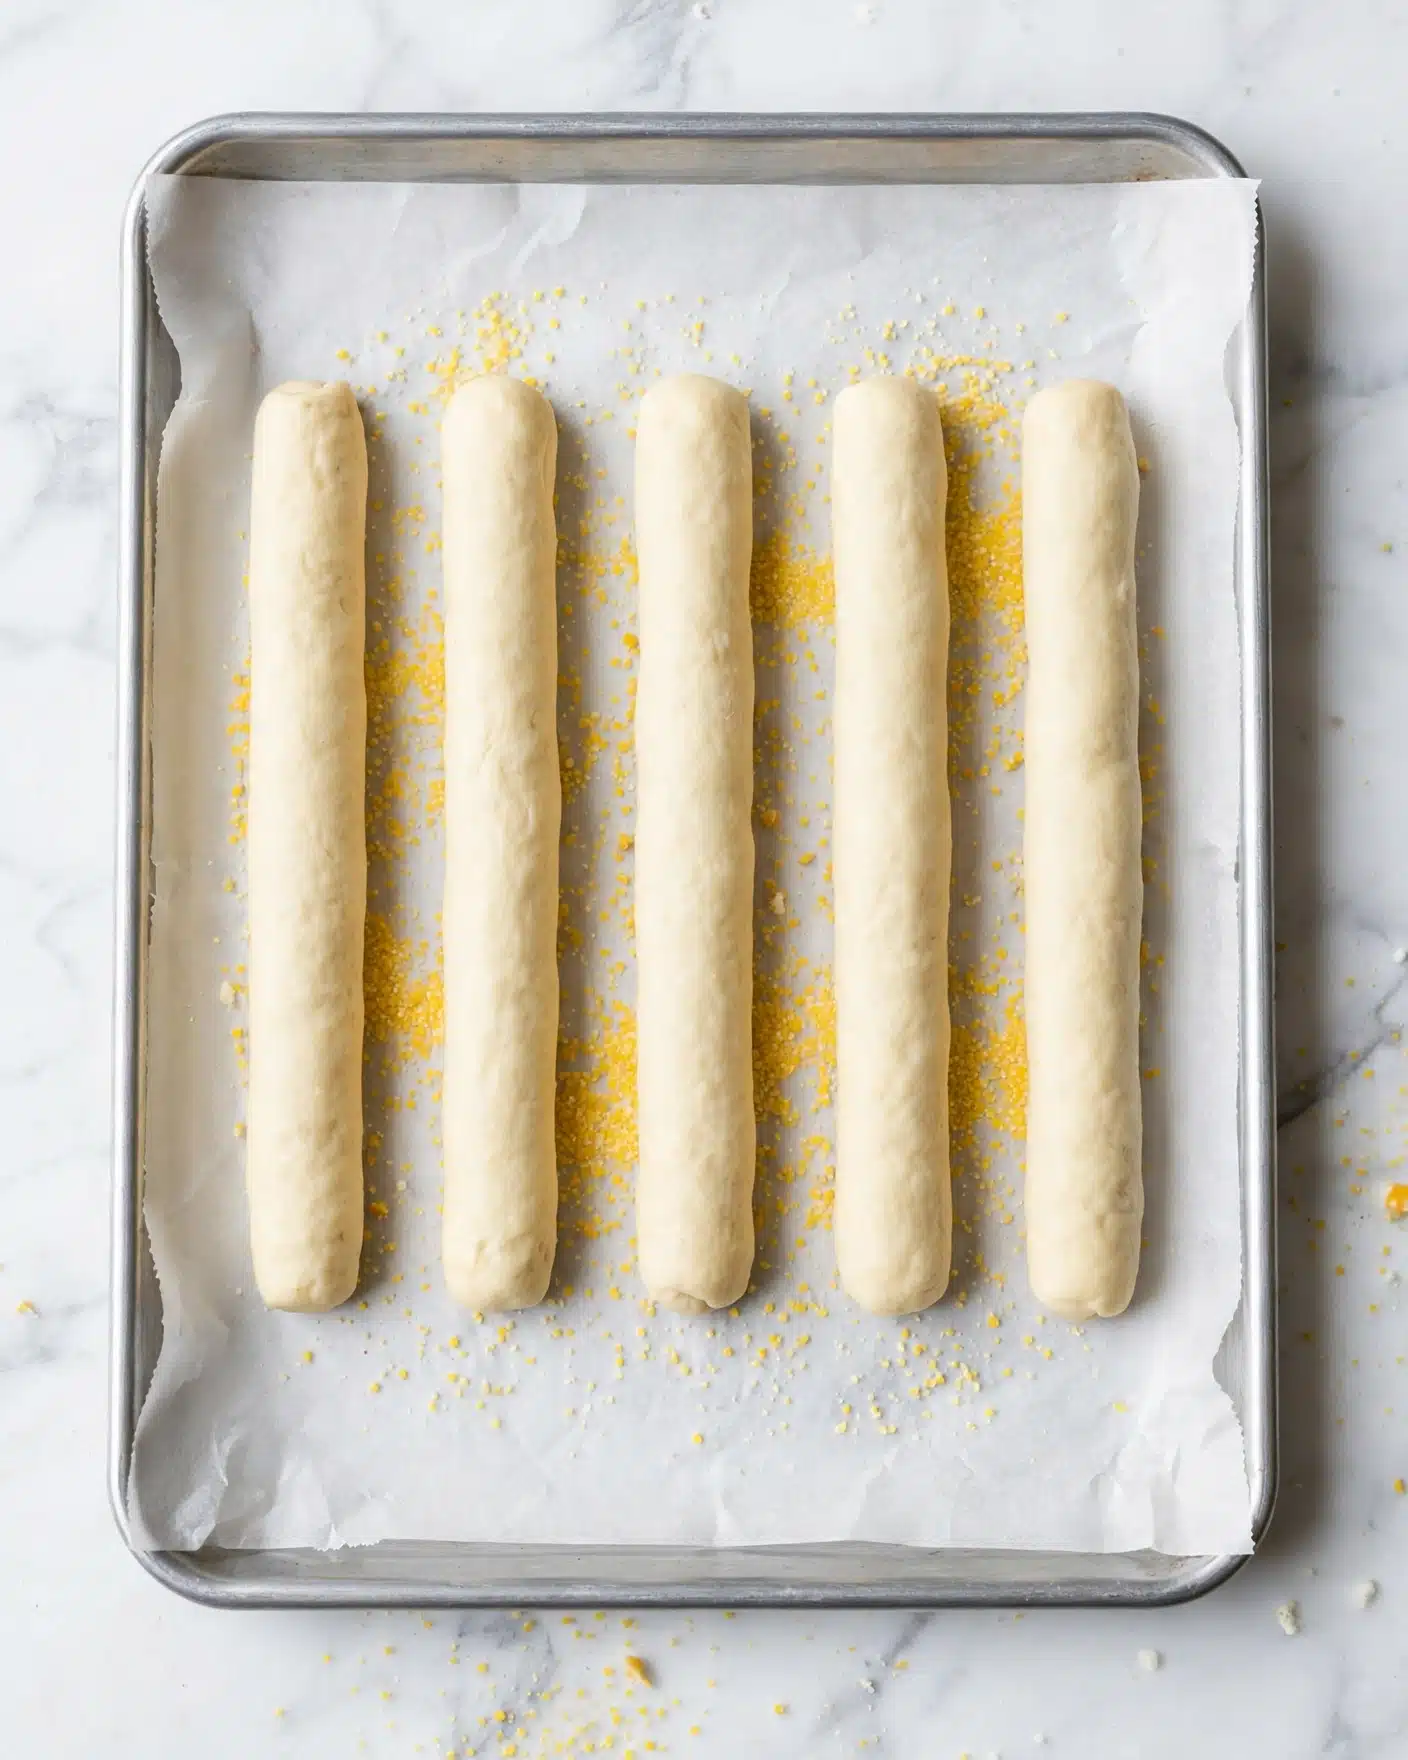
Line a baking sheet with parchment paper and sprinkle it lightly with cornmeal if you like a subtle crunch beneath your breadsticks. On your floured or lightly sprayed work surface, cut the dough into six even pieces—about 65 grams each keeps things uniform for even baking. Roll each piece into a breadstick about 7 inches long, then arrange them on the pan with a bit of breathing room. Cover them again with a clean cloth to proof in a warm spot until they puff up roughly 20% larger. Depending on your kitchen’s warmth, this should take 20 to 30 minutes.
Step 4: Baking
Once proofed, preheat your oven to 400°F and position the rack in the middle. When the oven is ready and your breadsticks look visibly puffier, slide them in for a 10-minute bake. This step starts building the perfect light crust.
Step 5: Garlic Butter Preparation
While your breadsticks bake, melt the unsalted butter over medium-low heat. Stir in the garlic powder (or fresh garlic), dried parsley, and a pinch of kosher salt. Let this warm mixture infuse for about a minute until all those beautiful aromas emerge. Remove from heat just before your first baking session ends.
Step 6: Brushing and Final Bake
After 10 minutes, pull the breadsticks from the oven and brush them generously with your homemade garlic butter. Then crank the oven up to 450°F and pop them back in for 5 to 8 more minutes until they turn a gorgeous golden brown. Once out, brush them again immediately with the remaining garlic butter for a soft, shiny crust that tastes like pure comfort.
Step 7: Cooling
Let your breadsticks cool for a few minutes. This rest allows the bread to set, locking in all their flavor and giving you that perfect texture bite after bite.
How to Serve Gluten Free Breadsticks with Garlic Butter Recipe

Garnishes
For an extra pop of freshness and color, sprinkle the breadsticks with freshly chopped parsley or a light dusting of parmesan cheese right after baking. This adds a little zing that contrasts beautifully with the buttery garlic base.
Side Dishes
These breadsticks are fantastic with vibrant soups like tomato basil, creamy Alfredo pasta, or alongside a hearty salad loaded with crisp veggies and tangy vinaigrette. They also make a welcoming appetizer served with a variety of dips such as marinara, pesto, or even a zesty hummus.
Creative Ways to Present
For parties or casual gatherings, serve your gluten free breadsticks in a rustic basket lined with a brightly colored napkin to make them instantly inviting. Try stacking them in crisscross patterns or arranging them fan-like on a wooden board paired with little bowls of dipping sauces—it’s as delightful to look at as it is to eat.
Make Ahead and Storage
Storing Leftovers
If you have leftovers, store your cooled gluten free breadsticks in an airtight container at room temperature for up to two days. This keeps them soft but ready to be quickly reheated for enjoyment later.
Freezing
You can freeze the breadsticks either before or after baking. Wrap individual sticks tightly in plastic wrap and then place them in a freezer bag. Frozen breadsticks last up to one month and thaw quickly at room temperature or in a warm oven.
Reheating
To reheat, place your breadsticks on a baking sheet and warm them in an oven preheated to 350°F for about 5 to 7 minutes. This method revives their crisp outside and soft inside beautifully. Alternatively, microwaving for short bursts works, though you might lose some of that fresh-baked texture.
FAQs
Can I use fresh garlic instead of garlic powder in this Gluten Free Breadsticks with Garlic Butter Recipe?
Absolutely! Fresh minced garlic adds a punch of robust flavor. Just sauté it gently with the butter to mellow any sharpness before brushing on the breadsticks.
What if I don’t have Caputo Fioreglut gluten free flour? Can I substitute it?
You can try other high-quality gluten free flour blends, but the texture and rise might differ slightly. Caputo Fioreglut is specially formulated for bread, so it helps achieve that perfect lightness and chew.
Is the milk powder necessary?
Milk powder is optional and primarily helps with browning and a subtle richness. Omit it if you are avoiding dairy; your breadsticks will still taste great.
Can I make these breadsticks vegan?
Yes, simply swap the unsalted butter for a plant-based alternative and use olive oil, plus omit milk powder. The texture will remain delightful with these tweaks.
How do I know when my breadsticks are proofed enough before baking?
Look for the breadsticks to puff up about 20% larger than their original size and become visibly softer and a bit jiggly when gently pressed. This indicates the yeast has done its work and they’re ready for the oven.
Final Thoughts
This Gluten Free Breadsticks with Garlic Butter Recipe is a fantastic addition to your baking repertoire, combining ease and extraordinary flavor that will impress family and friends alike. Once you try making these at home, you’ll realize how wonderfully satisfying it is to create fresh, gluten free comfort food with your own hands. So roll up your sleeves, preheat your oven, and prepare to enjoy every buttery, garlicky bite. I can’t wait for you to experience the joy of these breadsticks and make them a go-to in your gluten free kitchen!
Print
Gluten Free Breadsticks with Garlic Butter Recipe
- Total Time: 1 hour 5 minutes
- Yield: 6 breadsticks
- Diet: Gluten Free
Description
Delicious, soft gluten free breadsticks made with a blend of Caputo Fioreglut and super fine brown rice flour, enhanced with a flavorful garlic butter glaze. Perfect as a snack or accompaniment, these breadsticks are easy to shape, proofed for a light texture, and baked to a golden finish.
Ingredients
Dough Ingredients
- 150 grams water
- 120 grams Caputo Fioreglut Gluten Free Flour
- 70 grams super fine brown rice flour
- 10 grams granulated sugar
- 5 grams milk powder (Optional)
- 3 grams kosher salt
- 3 grams Instant Yeast
- 10 grams olive oil
- a little fine/medium coarse cornmeal for the baking sheet (Optional)
Garlic Butter Topping
- 50 grams unsalted butter
- 1 teaspoon garlic powder (or fresh minced garlic)
- 1 teaspoon dried parsley
- generous pinch of kosher salt
Instructions
- Warm Water Preparation: Warm the water in a microwave safe bowl for about 45 to 60 seconds, then allow it to cool to between 120 and 129°F to activate the yeast properly without killing it.
- Mix Dry Ingredients: In a mixing bowl, whisk together Caputo Fioreglut Gluten Free Flour, super fine brown rice flour, instant yeast, milk powder (if using), granulated sugar, and kosher salt to ensure even distribution.
- Combine Wet and Dry: Add the warm water and olive oil to the dry mixture. Using a Danish Dough Whisk or wooden spoon, stir until the dough turns wet and slightly lumpy at first, then continues stirring until it becomes smooth.
- Shape Dough Ball: Scrape down the bowl’s sides with a flexible spatula and shape the dough into a ball to facilitate easy transfer.
- Rest Dough: Cover the bowl with a clean towel and let the dough rest for 10 to 15 minutes to hydrate the flours and begin fermentation.
- Prepare Baking Surface: Line a sheet tray with parchment paper and sprinkle lightly with fine or medium coarse cornmeal, which is optional but prevents sticking.
- Shape Breadsticks: Lightly dust your work surface with gluten free flour or use non-stick spray. Cut the dough into six equal portions (about 65 grams each) using a bench scraper or sharp knife, then gently roll each into a 7-inch long breadstick.
- Proof Breadsticks: Place shaped breadsticks on the prepared tray spaced apart. Cover them with a clean tea towel and let rise in a warm place until they grow about 20% larger, approximately 20 to 30 minutes depending on your environment.
- Preheat Oven: When breadsticks have risen noticeably, preheat the oven to 400°F, positioning the rack in the middle for even baking.
- Bake First Stage: Place the proofed breadsticks into the fully preheated oven and bake for 10 minutes, allowing them to expand further and start browning.
- Prepare Garlic Butter: While breadsticks bake, melt unsalted butter in a small sauté pan over medium-low heat. Add garlic powder or fresh minced garlic, dried parsley, and a pinch of kosher salt. Sauté for about 1 minute until fragrant, then remove from heat.
- Brush with Garlic Butter: Remove breadsticks from the oven after 10 minutes and generously brush them with the prepared garlic butter for flavor and moisture.
- Bake Second Stage: Return the breadsticks to the oven, increase the temperature to 450°F and bake for another 5 to 8 minutes or until golden brown, watching carefully as times vary by oven.
- Final Butter Brush: Remove the breadsticks from the oven and place the baking tray on a cooling rack. Immediately brush them again with garlic butter to give a soft crust and beautiful sheen.
- Cool and Serve: Allow the breadsticks to cool for a few minutes before serving to enjoy the perfect texture and flavor.
Notes
- Milk powder is optional but adds tenderness and flavor to the dough.
- Sprinkling cornmeal on the baking sheet helps prevent sticking and adds a slight crunch.
- Proofing times vary based on kitchen temperature and humidity; warm, humid environments accelerate proofing.
- The garlic butter brush after baking enhances flavor and gives a shiny, soft crust.
- Keep breadsticks similarly sized to ensure even baking.
- Prep Time: 20 minutes
- Cook Time: 20 minutes
- Category: Bread
- Method: Baking
- Cuisine: Italian


