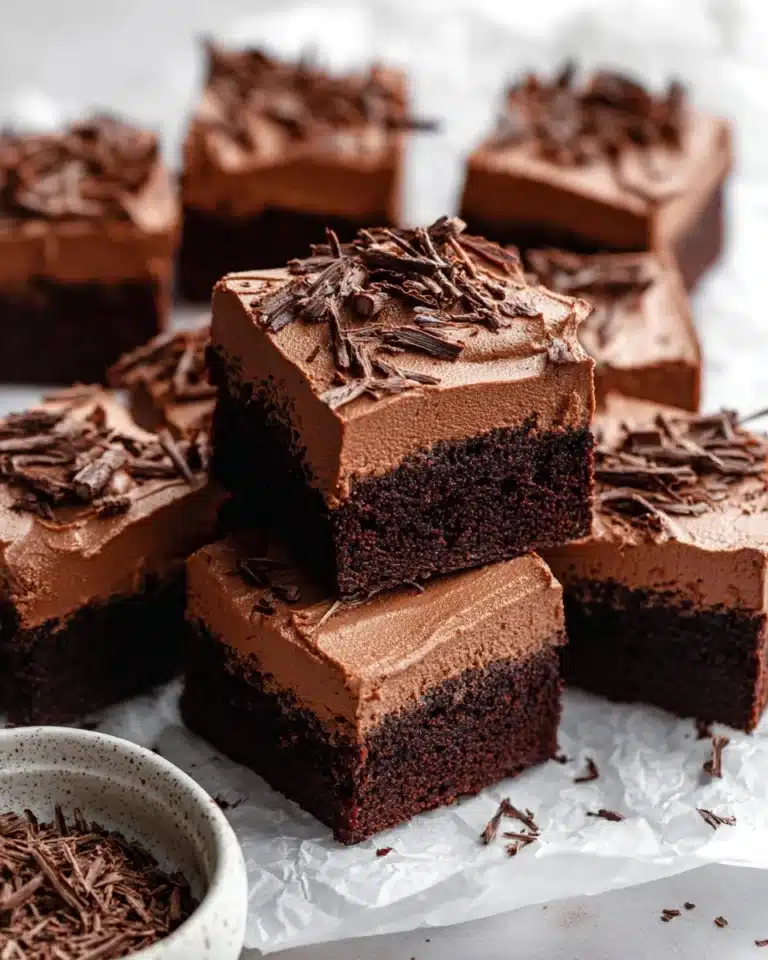
There’s nothing quite like diving into a Nanaimo Bars Recipe to experience a perfect trifecta of textures and flavors all in one bite. These no-bake dessert bars boast a rich and crumbly base, a luscious custard-flavored middle layer, and a glossy chocolate topping that simply melts in your mouth. Whether you’re a seasoned baker or a kitchen newbie, this iconic Canadian treat brings a nostalgic, irresistible charm that’s sure to brighten any gathering or satisfy your sweet tooth on a quiet afternoon.
Ingredients You’ll Need

Gathering the ingredients for this Nanaimo Bars Recipe is delightfully straightforward. Each component plays a special role in creating the signature layers—offering crunch, creaminess, or that chocolate finish you’ll crave.
- Butter (1/2 cup): Essential for richness and to bind the base layer perfectly.
- Sugar (1/4 cup): Adds necessary sweetness and balances the cocoa’s bitterness.
- Cocoa powder (5 tablespoons): Provides a deep chocolate flavor for the base.
- Large egg (beaten): Helps create structure and moisture in the base layer when cooked carefully.
- Graham cracker crumbs (1 3/4 cups): Gives the crust its delightful crumbly texture and a subtle, toasty note.
- Shredded coconut (1 cup): Infuses a chewy texture and tropical flavor to balance the chocolate.
- Roasted almonds, finely chopped (1/2 cup): Adds crunch and nutty depth—roasting them unlocks amazing aroma.
- Softened butter (1/2 cup): For the creamy custard layer, making it luxuriously smooth.
- Cream (3 tablespoons): Keeps the custard layer light and fluffy.
- Custard powder (2 tablespoons): The magic ingredient that delivers that classic Nanaimo custard flavor.
- Icing sugar (2 cups): Sweetens and lightens the custard layer to perfection.
- Dark or semi-sweet chocolate chips (2/3 cup): Creates the shiny, decadent top layer.
- Softened butter (2 tablespoons): Smooths the chocolate layer for a glossy finish.
How to Make Nanaimo Bars Recipe
Step 1: Prepare the Base Layer
Start by lining an 8-inch square baking dish with parchment paper—it makes removing the bars a breeze later on. Melt the butter, sugar, and cocoa powder together in a double boiler to gently marry those rich flavors. Then, whisk in the beaten egg vigorously for about two minutes until the mixture thickens and the egg is fully cooked, ensuring a safe and silky base. Remove from heat and fold in the graham cracker crumbs, shredded coconut, and roasted almonds—this combo creates that signature nutty and textured foundation. Press everything firmly and evenly into your prepared dish. This layer is what gives Nanaimo bars their delightful crunch and deep chocolate taste.
Step 2: Whip Up the Custard Filling
Using a stand mixer fitted with a whisk attachment (or a hand beater), beat the softened butter, cream, custard powder, and icing sugar until the mixture becomes soft, fluffy, and pale in color. This luscious custard middle is the heart of the bars—its light texture contrasts so beautifully with both the crunchy base and the firm chocolate top. Gently pour and spread this custard layer evenly over your chilled base using a rubber spatula.
Step 3: Chill the Custard Layer
Pop the dish into the fridge for about 30 minutes. This step is crucial for firming up the custard before applying the final chocolate layer so your bars retain those clean, tidy layers when cut.
Step 4: Create the Chocolate Topping
Gently melt the chocolate chips and softened butter together, either in short bursts in the microwave or over a double boiler, stirring often to prevent burning. Allow the mixture to cool for about five minutes to avoid melting the custard when spreading. Then, evenly spread this luscious chocolate over the firm custard layer. Transfer the entire dish back to the fridge to chill until the chocolate sets completely—this shiny top is the ultimate finishing touch.
Step 5: Slice and Serve
To achieve clean, neat slices, run a knife around the edges of the bars to loosen them from the dish. Then invert the bars onto a cutting board, peel away the parchment, and slice into squares. Each bar reveals the beautiful tri-layered structure that makes this Nanaimo Bars Recipe so beloved.
How to Serve Nanaimo Bars Recipe

Garnishes
While these bars are stunning on their own, you can elevate presentation with a light dusting of cocoa powder or a sprinkle of finely chopped toasted almonds on top. For a little extra flair, try drizzling a thin stream of white chocolate across the bars after the dark chocolate has set—this contrast will wow your guests visually and add a hint of extra sweetness.
Side Dishes
Nanaimo bars pair wonderfully with a cup of freshly brewed coffee or a creamy vanilla latte. Their rich sweetness balances perfectly with the slightly bitter and warm notes of coffee. If you’re serving at a more formal gathering, offering fresh berries or a small bowl of whipped cream on the side adds refreshing pops of flavor and texture.
Creative Ways to Present
If you want to make the Nanaimo Bars Recipe the star of your dessert table, consider cutting the bars into bite-sized squares and arranging them on a platter with edible flowers or mint leaves for a pop of color. You can also press some finely chopped nuts along the edges before the chocolate sets for a rustic yet elegant finish. For kid-friendly parties, wrapping individual bars in parchment or decorative cupcake liners makes them easy to grab and enjoy without any mess.
Make Ahead and Storage
Storing Leftovers
Leftover Nanaimo bars keep exceptionally well in an airtight container in the refrigerator for up to five days. Keeping them chilled preserves the crisp texture of the base and the smoothness of the custard and chocolate layers. If the bars feel too firm when chilled, just let them sit at room temperature for about 10 minutes before serving to soften slightly.
Freezing
Want to make these treats ahead of time? Nanaimo bars freeze beautifully! Wrap them tightly in plastic wrap and then place them in a freezer-safe container or zip-top bag to prevent freezer burn. They can be frozen for up to two months. When ready to enjoy, thaw them overnight in the fridge to maintain their perfect texture.
Reheating
Since Nanaimo bars are best served chilled or at room temperature, reheating isn’t usually recommended. But if you prefer a softer bite, let them warm gently at room temperature for about 20 minutes—avoid microwaving as it can melt the layers unevenly and alter the texture.
FAQs
Can I use a substitute for custard powder in this Nanaimo Bars Recipe?
Absolutely! If custard powder is not available, you can use a combination of cornstarch and a bit of vanilla extract to mimic the thickening and flavor qualities. However, custard powder does give that classic Nanaimo taste that’s hard to replicate perfectly.
Do I have to roast the almonds for the base layer?
Roasting the almonds is highly recommended as it brings out their natural oils and intensifies the nutty flavor, adding depth to the base layer. If you skip roasting, you might find the flavor a bit muted, but the bars will still turn out delicious.
Can I make the Nanaimo Bars Recipe vegan?
While the traditional recipe uses butter, egg, and custard powder, you can experiment with vegan butter substitutes, egg replacers, and plant-based custard powders to create vegan-friendly bars. Keep in mind that texture and taste might vary slightly, but it’s a fun challenge worth trying!
What’s the best way to cut the bars for a clean look?
Using a sharp knife warmed in hot water and wiped dry before each cut helps achieve smooth slices without cracking or crumbling the layers. Take your time and make sure the bars are well chilled for the cleanest results.
Can I customize the toppings on these bars?
Definitely! While the chocolate top is traditional, you can experiment with white chocolate, caramel drizzle, crushed nuts, or even a sprinkle of sea salt to add a unique twist. Just ensure the topping layer is firm enough to hold the additions before serving.
Final Thoughts
If you haven’t yet tried this Nanaimo Bars Recipe, now is the perfect time to dive in and experience its delightful layers of flavor and texture. It’s truly one of those desserts that brings people together—whether at a cozy family gathering or a festive celebration. Once you taste these bars, they might just become your new favorite sweet indulgence to share and savor again and again.
Print
Nanaimo Bars Recipe
- Total Time: 40 minutes
- Yield: 8 servings
Description
Nanaimo Bars are a classic Canadian no-bake dessert featuring three decadent layers: a rich cocoa and almond crumb base, a creamy custard-flavored butter layer, and a smooth dark chocolate topping. These bars combine a crunchy bottom with a fluffy middle and a glossy chocolate finish, making them a perfect treat for gatherings or any sweet craving.
Ingredients
Base Layer
- 1/2 cup butter
- 1/4 cup sugar
- 5 tablespoons cocoa powder
- 1 large egg (beaten)
- 1 3/4 cups graham cracker crumbs
- 1 cup shredded coconut
- 1/2 cup roasted almonds (finely chopped)
Custard Middle Layer
- 1/2 cup softened butter
- 3 tablespoons cream
- 2 tablespoons custard powder
- 2 cups icing sugar
Chocolate Topping
- 2/3 cup dark chocolate chips (or semi-sweet)
- 2 tablespoons softened butter
Instructions
- Prepare Baking Dish: Line an 8-inch square baking dish with parchment paper on the bottom to prevent sticking and ensure easy removal of the bars.
- Make the Base Mixture: In a double boiler, melt the butter, sugar, and cocoa powder together. Gradually add the beaten egg, whisking continuously for 2 minutes until the mixture thickens and the egg is fully cooked, creating a smooth chocolate base.
- Combine Dry Ingredients & Press: Remove the base mixture from heat, then stir in the graham cracker crumbs, shredded coconut, and finely chopped roasted almonds. Press this mixture evenly into the prepared baking dish to form the bottom layer of the bars.
- Whip the Custard Filling: Using a stand mixer with the whisk attachment or a hand mixer, beat the softened butter, cream, custard powder, and icing sugar together for about 3 minutes until the mixture is soft, fluffy, and pale in color.
- Assemble the Middle Layer: Pour the custard filling over the base layer in the baking dish. Use a rubber spatula to spread it gently and evenly. Refrigerate the dish for 30 minutes to allow this layer to firm up.
- Melt Chocolate Topping: Melt the dark chocolate chips and butter together either in the microwave or over a double boiler. Let the mixture cool for about 5 minutes to thicken slightly, then spread it evenly over the chilled custard layer as the final chocolate topping.
- Chill and Set: Place the assembled dessert in the fridge again and chill until the chocolate topping is fully set and firm.
- Serve: To remove the bars, carefully run a knife around the edges of the baking dish. Invert the dish onto a cutting board to release the entire block, then cut into 8 equal servings and enjoy.
Notes
- Roast raw almonds in an air fryer at 400°F for 5 minutes for enhanced flavor and crunch.
- Use parchment paper on the bottom of the baking dish to ensure easy removal.
- Be sure to whisk the base mixture well to cook the egg through and avoid any raw egg taste.
- Let the chocolate topping cool slightly before spreading to prevent it from melting the custard layer.
- Store bars in the refrigerator to keep layers firm and fresh.
- Prep Time: 10 minutes
- Cook Time: 10 minutes
- Category: Dessert
- Method: No-Cook
- Cuisine: Canadian