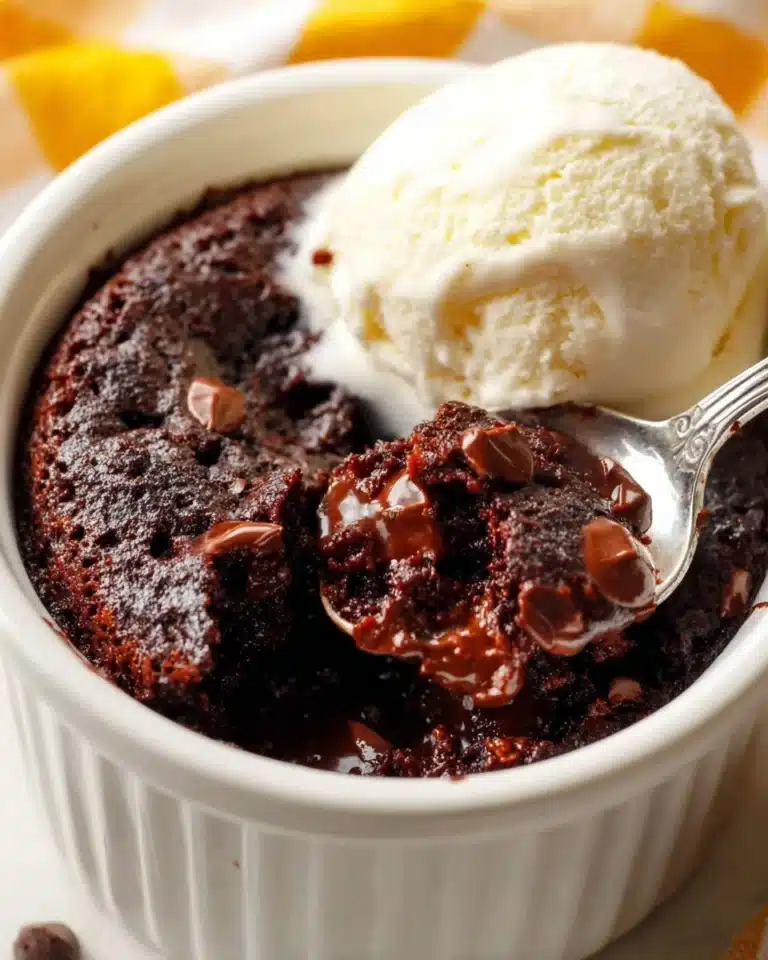
If you’re craving a warm, cozy treat that’s perfectly suited for autumn or any time you want a little indulgence, this Gluten Free Pumpkin Bars Recipe will quickly become your go-to favorite. These bars combine the rich, earthy flavor of pumpkin with a moist, tender crumb that’s completely free of gluten, making them suitable for anyone with dietary preferences or restrictions. With a touch of vegan butter and melty chocolate chips scattered throughout, each bite is a delightful balance of sweetness and spice. They’re simple to make, wonderfully satisfying, and perfect for sharing with friends and family.
Ingredients You’ll Need

These ingredients are straightforward but magic in creating such a tender and flavorful pumpkin bar. Each item plays an important role, from moisture and sweetness to texture and that perfect pumpkin aroma.
- Vegan butter (1/4 cup, softened): Adds creaminess and richness without dairy, ensuring the bars stay moist and tender.
- Brown sugar (3/4 cup): Offers deep, caramel-like sweetness and keeps the texture soft and chewy.
- Pumpkin puree (1/2 cup): The star ingredient that brings moisture, vibrant color, and that signature pumpkin flavor.
- Gluten free flour (1 1/4 cups): Provides structure and crumb without gluten, making the bars accessible to those avoiding wheat.
- Baking powder (1/2 teaspoon): Gives the bars a gentle lift to keep them light and fluffy.
- Salt (1/2 teaspoon): Enhances all the flavors, balancing sweetness perfectly.
- Chocolate chips (1/2 cup): For pockets of melted chocolate that add a sweet, slightly gooey surprise in every bite – use dairy-free if needed.
How to Make Gluten Free Pumpkin Bars Recipe
Step 1: Preheat and Prepare Your Pan
Start by heating your oven to 350°F (175°C). Line an 8×8 or 9×9 baking pan with parchment paper to ensure the bars come out easily after baking. If you prefer, a light coating of oil works just as well to prevent sticking.
Step 2: Cream Vegan Butter and Brown Sugar
In a large bowl, whip together the softened vegan butter and brown sugar until the mixture looks light and fluffy. This step is key because it creates a smooth base that will give your bars a tender crumb and that lovely caramel undertone.
Step 3: Add Pumpkin Puree
Beat in the pumpkin puree until everything is fully combined. The puree adds moisture and flavors the mixture with its naturally sweet, earthy notes—no need for extra liquid here!
Step 4: Mix Dry Ingredients
Incorporate the gluten free flour, baking powder, and salt into the wet ingredients. Stir gently but thoroughly, being careful not to overmix to maintain a soft texture in the final bars.
Step 5: Fold in the Chocolate Chips
Gently fold the chocolate chips into the batter, making sure they’re evenly distributed. This step ensures every bite has a perfect hit of chocolatey goodness.
Step 6: Bake to Perfection
Pour the batter into your prepared pan and smooth the top. Bake for about 30 minutes or until a toothpick inserted into the center comes out clean. The kitchen will fill with a fantastic pumpkin-spice aroma that’s impossible not to love.
Step 7: Cool Before Serving
Allow the bars to cool completely in the pan before slicing. This helps them firm up so they cut cleanly and hold their shape beautifully.
How to Serve Gluten Free Pumpkin Bars Recipe

Garnishes
For a simple yet inviting finish, sprinkle a light dusting of powdered sugar or add a dollop of dairy-free whipped cream. If you feel a little adventurous, a sprinkle of cinnamon or nutmeg on top complements the pumpkin flavor wonderfully.
Side Dishes
These pumpkin bars pair beautifully with a hot cup of tea, coffee, or even a creamy chai latte. For an extra special treat, serve alongside a scoop of vanilla or pumpkin-flavored ice cream for a dessert that’ll wow anyone lucky enough to share it with you.
Creative Ways to Present
Slice the bars into small squares and serve them on a rustic wooden board with nuts and dried fruits for a charming fall-themed dessert platter. You could also turn them into layered parfaits by crumbling a bar and pairing it with layers of yogurt and fresh berries in a glass.
Make Ahead and Storage
Storing Leftovers
Keep your leftover gluten free pumpkin bars in an airtight container at room temperature for up to three days. For longer storage, placing them in the refrigerator will keep them fresh for about a week while maintaining their delicious texture.
Freezing
These bars freeze wonderfully. Wrap them tightly in plastic wrap or foil and place in a freezer-safe container or bag. They can last up to three months frozen without losing their moist, tender quality.
Reheating
To enjoy warm pumpkin bars, gently reheat individual slices in the microwave for 15 to 20 seconds or pop them in a low oven (around 300°F / 150°C) for 5 to 7 minutes. Freshly warmed bars bring out the best flavor and a lovely soft texture.
FAQs
Can I use canned pumpkin for this recipe?
Absolutely! Canned pumpkin puree is perfect and makes this recipe even easier. Just make sure it’s pure pumpkin and not pumpkin pie filling, which has added sugars and spices.
Is there a way to make these bars nut-free?
Yes, this recipe is naturally nut-free as long as your gluten free flour blend doesn’t contain nuts. Double-check your ingredients to be sure, and avoid adding nuts to the batter if you want to keep it nut-free.
Can these bars be made without vegan butter?
If you don’t have vegan butter, you can substitute with coconut oil or any mild-flavored oil. Keep in mind that oils may slightly change the texture so the bars might be a bit more dense or crumbly.
How can I make these pumpkin bars more spiced?
Feel free to add ground cinnamon, nutmeg, ginger, or cloves to the dry ingredients to give your bars a classic autumn spice flavor. Start small, about 1/2 teaspoon of cinnamon and a pinch of others, then adjust to taste.
Can I double this recipe to make a bigger batch?
Definitely! Just double all the ingredients and use a larger pan, like 9×13. Adjust the baking time accordingly—start checking at around 35 minutes but it may take closer to 45 minutes.
Final Thoughts
There’s nothing quite like the warm, comforting feeling of biting into something homemade, especially when it’s as wholesome and delicious as this Gluten Free Pumpkin Bars Recipe. It’s a wonderful way to enjoy pumpkin’s vibrant flavors without worry, perfect for sharing or keeping all to yourself. Give this recipe a try—you might just find a new favorite fall treat to savor again and again!
Print
Gluten Free Pumpkin Bars Recipe
- Total Time: 40 minutes
- Yield: 9 servings
- Diet: Gluten Free
Description
These Gluten Free Pumpkin Bars are a delicious and moist treat perfect for fall. Made with pumpkin puree, gluten free flour, and dairy-free chocolate chips, they offer a soft and flavorful bite that’s both vegan and allergy-friendly. Easy to prepare and bake, these bars make a great snack or dessert for anyone avoiding gluten or dairy.
Ingredients
Wet Ingredients
- 1/4 cup vegan butter (softened)
- 3/4 cup brown sugar
- 1/2 cup pumpkin puree
Dry Ingredients
- 1 1/4 cups gluten free flour
- 1/2 teaspoon baking powder
- 1/2 teaspoon salt
Mix-ins
- 1/2 cup chocolate chips (or dairy free chocolate chips)
Instructions
- Preheat the oven: Preheat your oven to 350°F (175°C) to ensure it reaches the correct temperature for even baking of the pumpkin bars.
- Prepare the baking pan: Line an 8×8 or 9×9 inch pan with parchment paper, or alternatively lightly spray it with oil to prevent the bars from sticking.
- Cream vegan butter and sugar: In a large bowl, mix the softened vegan butter and brown sugar together until the mixture is light and fluffy, which helps incorporate air for a tender texture.
- Add pumpkin puree: Beat in the pumpkin puree thoroughly until the wet ingredients are well combined.
- Combine dry ingredients: Add the gluten-free flour, baking powder, and salt to the wet mixture.
- Mix batter: Stir all ingredients together until fully combined and a consistent batter forms.
- Fold in chocolate chips: Gently fold the chocolate chips into the batter to evenly distribute without overmixing.
- Pour batter into pan: Transfer the batter into the prepared baking pan, spreading it out evenly.
- Bake: Bake in the preheated oven for 30 minutes, or until a toothpick inserted into the center comes out clean, indicating the bars are fully cooked.
- Cool and serve: Let the bars cool completely in the pan on a wire rack before cutting into 9 servings to ensure clean, sturdy bars.
Notes
- You can substitute vegan butter with coconut oil if preferred, but this may slightly change the texture.
- For a dairy-free and vegan option, be sure to use dairy-free chocolate chips.
- Make sure to use certified gluten-free flour if you have a gluten intolerance or celiac disease.
- These bars store well in an airtight container at room temperature for up to 3 days or can be refrigerated for up to a week.
- Feel free to add spices such as cinnamon or nutmeg for a more autumnal flavor.
- Prep Time: 10 minutes
- Cook Time: 30 minutes
- Category: Dessert
- Method: Baking
- Cuisine: American